
How to Make a Diversion Safe?
Creating a diversion safe is super practical and sneaky! You’ll need a common household item like a shaving cream can or a book. First, grab your trusty utility knife and carefully hollow it out, making sure it still looks untouched on the outside. Clean out any leftover bits, then use strong adhesive to secure the internal compartment—don’t skimp on this step! For added realism, you can label or paint it. Once done, hide your treasure inside and place it in a spot where it’d naturally belong. Thinking of a specific hiding spot or wondering what items work best? Stick around!
 A diversion safe is a clever hiding spot designed to look like an everyday object, tricking potential thieves and adding an extra layer of security for your valuables. Imagine hiding your precious items in plain sight, where no one would ever think to look. That’s the magic of diversion safes. They leverage their inconspicuous appearance, making it unlikely for thieves to search thoroughly through ordinary household items.
Let’s be honest, burglars aren’t going to rummage through a can of soup or a worn-out book when they’re in a hurry. By using hidden storage, you can stash cash, jewelry, and important documents safely. It’s like playing a game of hide-and-seek with your most treasured possessions, and spoiler alert: you always win!
You might think you need to buy one, but DIY diversion safes can be more effective. Customize them to fit your unique needs and home layout. That old shaving cream can in your bathroom? Perfect. Your dusty, forgotten DVD case? Even better. It’s all about blending in and staying low-key.
A diversion safe is a clever hiding spot designed to look like an everyday object, tricking potential thieves and adding an extra layer of security for your valuables. Imagine hiding your precious items in plain sight, where no one would ever think to look. That’s the magic of diversion safes. They leverage their inconspicuous appearance, making it unlikely for thieves to search thoroughly through ordinary household items.
Let’s be honest, burglars aren’t going to rummage through a can of soup or a worn-out book when they’re in a hurry. By using hidden storage, you can stash cash, jewelry, and important documents safely. It’s like playing a game of hide-and-seek with your most treasured possessions, and spoiler alert: you always win!
You might think you need to buy one, but DIY diversion safes can be more effective. Customize them to fit your unique needs and home layout. That old shaving cream can in your bathroom? Perfect. Your dusty, forgotten DVD case? Even better. It’s all about blending in and staying low-key.
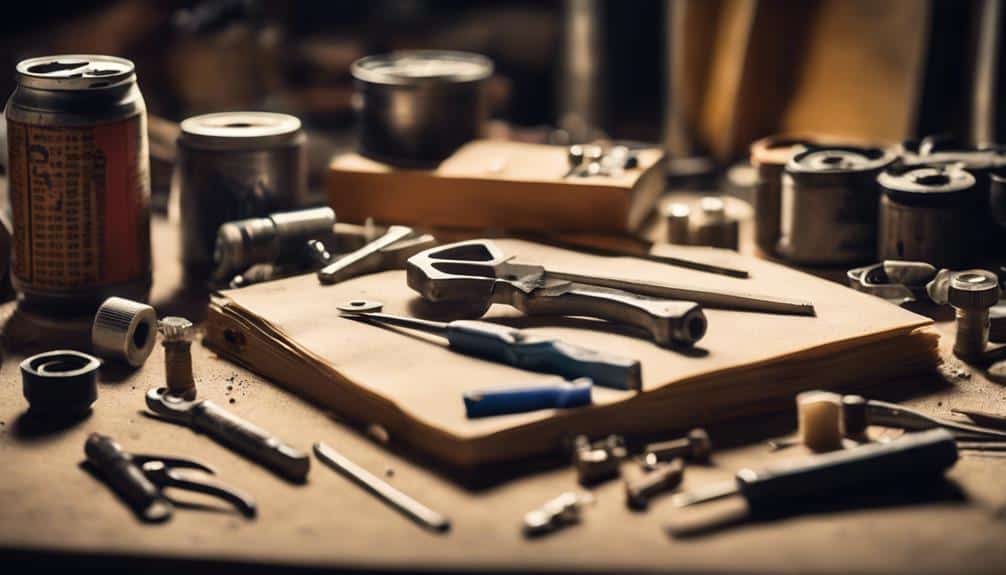 To get started on your diversion safe, you’ll need to gather some essential tools and materials. Don’t worry, it’s easier than you think!
For tools, grab a utility knife for those precise cuts, and a pair of scissors for trimming any extra bits. You’ll also need strong adhesive, like epoxy, to make sure everything sticks together snugly. If you’re working with cans, a side-cutting can opener is a must; it’ll give you a clean cut without ruining the can’s integrity. Binder clips and duct tape are lifesavers for temporarily holding things in place while the glue dries.
Now, let’s talk materials. First, pick an everyday item you want to modify—maybe a can, book, or even a cereal box. You’ll also need a smaller container, like a plastic jar, to hide your valuables inside. For that extra touch of authenticity, gather some labels or stickers to camouflage your creation perfectly.
If you’re feeling artistic, optional tools like paint can help your diversion safe blend seamlessly into its surroundings. Imagine the surprise on someone’s face when they realize that unassuming can or book is actually a clever hiding spot!
To get started on your diversion safe, you’ll need to gather some essential tools and materials. Don’t worry, it’s easier than you think!
For tools, grab a utility knife for those precise cuts, and a pair of scissors for trimming any extra bits. You’ll also need strong adhesive, like epoxy, to make sure everything sticks together snugly. If you’re working with cans, a side-cutting can opener is a must; it’ll give you a clean cut without ruining the can’s integrity. Binder clips and duct tape are lifesavers for temporarily holding things in place while the glue dries.
Now, let’s talk materials. First, pick an everyday item you want to modify—maybe a can, book, or even a cereal box. You’ll also need a smaller container, like a plastic jar, to hide your valuables inside. For that extra touch of authenticity, gather some labels or stickers to camouflage your creation perfectly.
If you’re feeling artistic, optional tools like paint can help your diversion safe blend seamlessly into its surroundings. Imagine the surprise on someone’s face when they realize that unassuming can or book is actually a clever hiding spot!
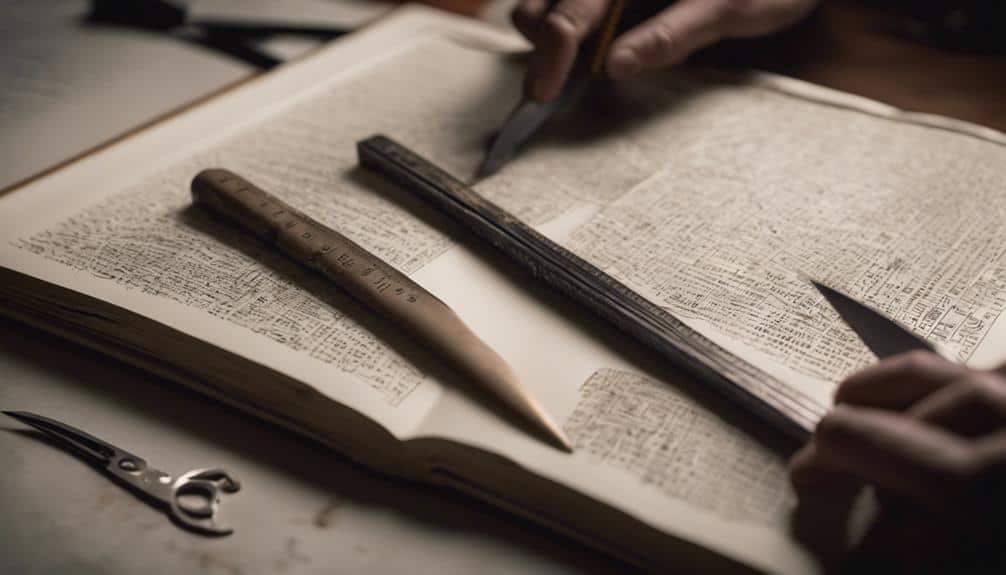 Now that you’ve picked out the perfect item, it’s time to get hands-on with hollowing it out.
Grab a utility knife or sharp scissors, and carefully cut away the interior while keeping the outside looking untouched—think of yourself as a secret agent.
For cans, a side-cutting can opener works wonders, making a sneaky opening at the bottom while the top stays sealed tight.
Now that you’ve picked out the perfect item, it’s time to get hands-on with hollowing it out.
Grab a utility knife or sharp scissors, and carefully cut away the interior while keeping the outside looking untouched—think of yourself as a secret agent.
For cans, a side-cutting can opener works wonders, making a sneaky opening at the bottom while the top stays sealed tight.
 Make certain your diversion safe functions flawlessly by testing the hidden compartment to see if it opens easily and remains secure. You don’t want to struggle every time you need to access your valuables or, worse, have it accidentally pop open when guests are over.
Regularly test the safe to check for any signs of wear or damage. A damaged safe is like a leaky boat—it’s not going to keep anything safe!
To amp up the security, you might want to add a lock or some other clever feature. Imagine a thief finding your diversion safe and then realizing it’s locked—talk about frustrating for them!
And hey, it’s always a good idea to clue in your household members on where the safe is and how to use it. You wouldn’t want Grandma accidentally discovering it and thinking she hit the jackpot with a secret stash.
Make certain your diversion safe functions flawlessly by testing the hidden compartment to see if it opens easily and remains secure. You don’t want to struggle every time you need to access your valuables or, worse, have it accidentally pop open when guests are over.
Regularly test the safe to check for any signs of wear or damage. A damaged safe is like a leaky boat—it’s not going to keep anything safe!
To amp up the security, you might want to add a lock or some other clever feature. Imagine a thief finding your diversion safe and then realizing it’s locked—talk about frustrating for them!
And hey, it’s always a good idea to clue in your household members on where the safe is and how to use it. You wouldn’t want Grandma accidentally discovering it and thinking she hit the jackpot with a secret stash.
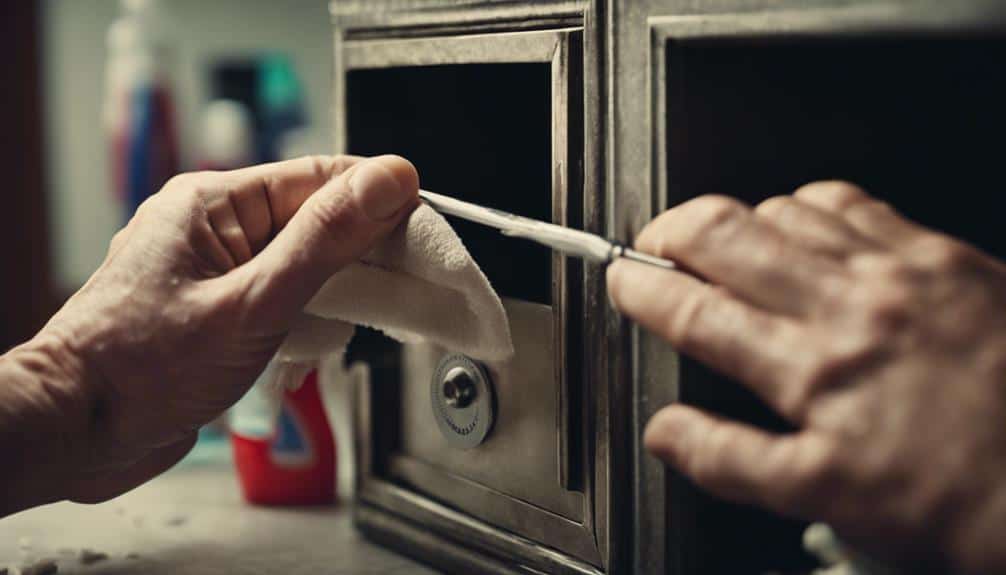 Regularly inspecting your diversion safe for wear and damage guarantees it stays convincing and secure. You don’t want your hidden storage to look shabby or out of place, right? So, give it a good once-over now and then.
Check for any signs of wear, damage, or changes in its appearance that might give away its true purpose. If it looks off, it won’t be fooling anyone!
One of the essential maintenance tips is to update the contents periodically. Sticking to a routine can be risky; potential thieves might catch on. Mix it up a bit, keep them guessing.
Also, keep your safe in a spot that’s not too obvious. Rotate its placement occasionally to stay one step ahead.
Make sure everyone in your household knows about the safe. You don’t want someone tossing it out or exposing it by accident! It’s all about teamwork.
Lastly, while your diversion safe is great, it’s smart to have a backup method for securing valuables. Think of it as your safety net. A monitored security system or a traditional safe can add that extra layer of security you need.
Regularly inspecting your diversion safe for wear and damage guarantees it stays convincing and secure. You don’t want your hidden storage to look shabby or out of place, right? So, give it a good once-over now and then.
Check for any signs of wear, damage, or changes in its appearance that might give away its true purpose. If it looks off, it won’t be fooling anyone!
One of the essential maintenance tips is to update the contents periodically. Sticking to a routine can be risky; potential thieves might catch on. Mix it up a bit, keep them guessing.
Also, keep your safe in a spot that’s not too obvious. Rotate its placement occasionally to stay one step ahead.
Make sure everyone in your household knows about the safe. You don’t want someone tossing it out or exposing it by accident! It’s all about teamwork.
Lastly, while your diversion safe is great, it’s smart to have a backup method for securing valuables. Think of it as your safety net. A monitored security system or a traditional safe can add that extra layer of security you need.
Definition and Purpose
Types of Diversion Safes
Diversion safes come in all shapes and sizes, cleverly disguised as everyday items to keep your valuables hidden in plain sight. Imagine your money tucked away inside a soda can that’s just sitting in the fridge, blending in with the rest of your groceries. These safes are masters of disguise, making it hard for anyone to suspect a thing. You’ve got a variety of options to choose from. A hollowed-out book safe is a classic, perfect for slipping onto your bookshelf where it can stay hidden among your novels. Then there are food container safes, like those disguised as common snacks or pantry items. Who’d think to check a can of soup for cash, right? But that’s not all! More creative choices include potted plant safes, where a sealed container hides in the soil. Just picture it: your precious items concealed within a plant, practically undetectable. And don’t forget about the sneaky hairbrush or pillow safes, offering clever alternatives to traditional designs. Choosing the right diversion safe means picking something that blends seamlessly into your environment. The key is to guarantee it’s hidden in plain sight, making it a brilliant way to keep your valuables safe.Tools and Materials
Choosing an Item
Now that you have your tools and materials ready, it’s time to pick the perfect household item to transform into your diversion safe. Think about common objects that blend right into your living space—items like books, food containers, or toiletries. You want something that won’t scream, ‘Hey, look at me!’ to any would-be thief. When you’re hiding your valuables, choosing an item with a small compartment is key. Look for things that aren’t used often or that people usually overlook. Let’s be real: no one is going to suspect your old shampoo bottle or a dusty cookbook. Just make sure the item you pick has enough room to snugly fit whatever you’re hiding without being obvious. Avoid flashy electronics or anything that looks too valuable because those might attract unwanted attention. Imagine this: that shiny new iPad box? Yeah, that’s a no-go. But a cereal box? Perfect. And think about practicality—you don’t want to be struggling to access your hidden items. So, choose something that’s easy to open and close when you need to retrieve your stuff. Trust me, a little thought now saves a lot of hassle later!Hollowing Out the Item
Choosing Suitable Items
Ever wondered which everyday items make the best diversion safes for hiding your valuables? Think about items that blend seamlessly into your surroundings, like a book, a soda can, or even a food container. These everyday objects transform into the perfect secret box, providing a clever hiding place for your treasures. To start, pick an item that won’t arouse suspicion. A dog-eared book on a crowded shelf, a soda can in the fridge, or a pasta box in the pantry—these are all goldmines for creating a diversion safe. The key is to keep it inconspicuous. Next, carefully hollow out the chosen item. Use a utility knife or a side-cutting can opener to do this without damaging the exterior. The aim is to keep the item looking untouched on the outside while creating a secret compartment inside. Make certain to clean out any remnants of the original contents to prevent any telltale signs. Once hollowed out, make sure the compartment is large enough to stash your cash, jewelry, or important documents. Reassemble the item convincingly. Adding a label or a sticker can help disguise any alterations, making it even less likely to draw suspicion. Voilà, you’ve got a perfect diversion safe!Tools and Techniques
To turn your chosen item into a functional diversion safe, you’ll need the right tools and techniques to hollow it out effectively. Start with a side-cutting can opener to create a clean cut at the bottom of a container, like a can. This keeps the top looking untouched, preserving the item’s original appearance. Next, grab a utility knife for hollowing out your item, whether it’s a book, a can, or another object. For a book, carefully remove the pages a little at a time. This way, you avoid tearing and keep the book’s shape intact, which is key for convincing hidden storage. Once you’ve got your compartment, make certain it’s deep enough to securely hold your valuables. Clean out any remaining residue or labels inside the hollowed item. You don’t want anything giving away your trick box! Lastly, reinforce the compartment with strong adhesive or epoxy. This guarantees it stays secure and can handle regular use. Now, your diversion safe is ready, blending seamlessly into your everyday surroundings while keeping your valuables hidden away. Isn’t it great to have a clever little hiding spot right under everyone’s noses?Reassembling the Safe
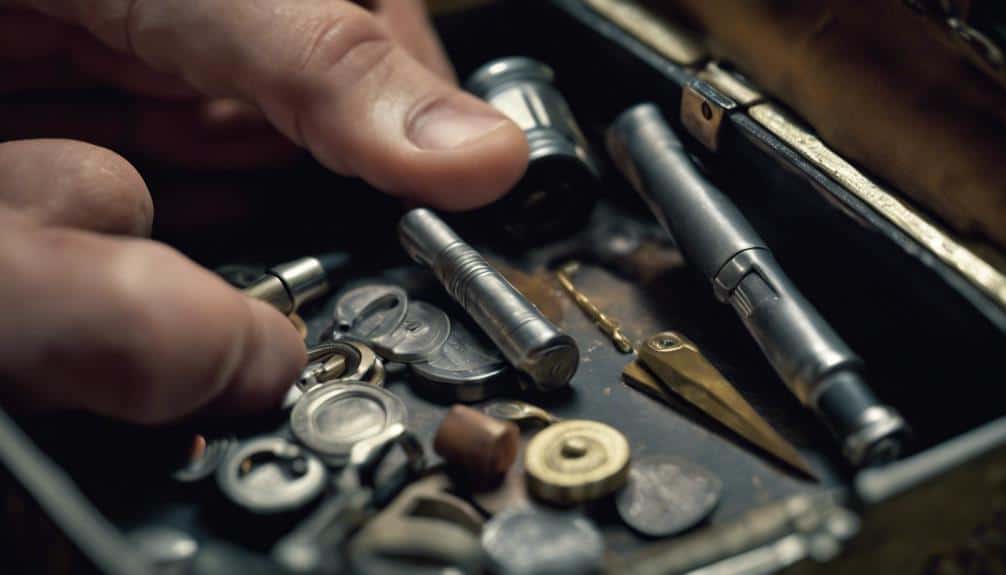
First, carefully align the internal compartment with the top of the can, guaranteeing a snug fit to prevent detection. This hidden storage setup should be as seamless as a well-disguised wall safe. You want it to blend in perfectly with your everyday items. Next, grab some strong adhesive like epoxy. This stuff is the superglue of the construction world. Use it to bond the plastic jar securely to the metal lid. Follow the instructions on the adhesive packaging, and give it time to cure. Patience here assures your safe won’t fall apart at the worst possible moment. When the adhesive is set and rock solid, it’s time to add some weight. Fill the hollowed-out can with plaster. This gives it stability, making it feel like a normal, everyday item. Adjust the lid as the plaster sets to make sure it closes tightly—no one should suspect there’s treasure inside! After the plaster dries, give the can a thorough once-over. Look for any irregularities, and make adjustments if needed. Your goal is to make it look like nothing more than an ordinary can. Voilà! You’ve got yourself a diversion safe that James Bond would be proud of.Testing and Securing
Optimal Hiding Spots
Choosing the right hiding spot for your diversion safe is essential to guarantee your valuables stay hidden and secure. You want to make sure your DIY diversion blends seamlessly into your environment. Let’s explore some ideal hiding spots that’ll keep your stuff safe and sound.- High shelves or cabinets in kitchens: These spots are brilliant because intruders rarely look up, especially if the shelves are filled with everyday items like old cookbooks or cereal boxes. It’s like hiding in plain sight!
- Hollowed-out tree stumps or logs in the yard: If you’ve got a garden, this is an awesome choice. Nature itself becomes your security guard. Just make sure it blends well with the rest of the landscape, so it doesn’t scream, “Hey, look here!”
- Old or worn-out shoes: Seriously, who’d think to look inside your beaten-up sneakers? This trick works indoors and is perfect for small valuables. Just be sure you remember which pair holds the goods!
Maintenance Tips
Additional Security Measures
To really up your security game, think about adding enhanced locking mechanisms and smart monitoring systems to your diversion safes. You wouldn’t want a thief to crack open your safe like it’s a cookie jar, right? With cameras and alarms, you’ll not only protect your valuables but also catch any sneaky snoopers red-handed!Enhanced Locking Mechanisms
Enhancing the security of your diversion safe can be achieved by adding advanced locking mechanisms such as combination locks, biometric systems, or hidden magnetic locks. These upgrades not only increase the difficulty for potential thieves but also guarantee your hidden storage remains just that—hidden. Imagine the peace of mind you’ll feel knowing your valuables are protected by the best in security technology. To get started, consider these enhancements:- Combination Locks: Adding a combination lock or a small padlock requires a code or key for access, making it much harder for unauthorized people to open your safe. It’s a classic yet effective solution.
- Hidden Magnetic Locks: These locks are activated by a specific magnetic key, adding an extra layer of secrecy. It’s a clever way to keep your safe secure without drawing attention to itself.
- Biometric Locks: For the tech-savvy, a biometric lock offers fingerprint recognition, providing advanced authentication. It’s like something out of a spy movie, right in your home!
6 Responses