Ready to
transform your dull throwing stars into razor-sharp, deadly projectiles? Start by grabbing some old steel—think shovels or saw blades—as your secret weapon. Shape them using an
angle grinder or hacksaw, keeping those edges neat! Drill holes for perfect balance, then grind away to get that precision look. Don’t forget the
heat treat! Pop them in a hot oven, quench them in oil, and polish them up for a shiny finish—because who doesn’t love shiny weapons? Finally,
practice your throwing stance and grip to ace your skills. Stick around, and you’ll uncover even more pro tips!
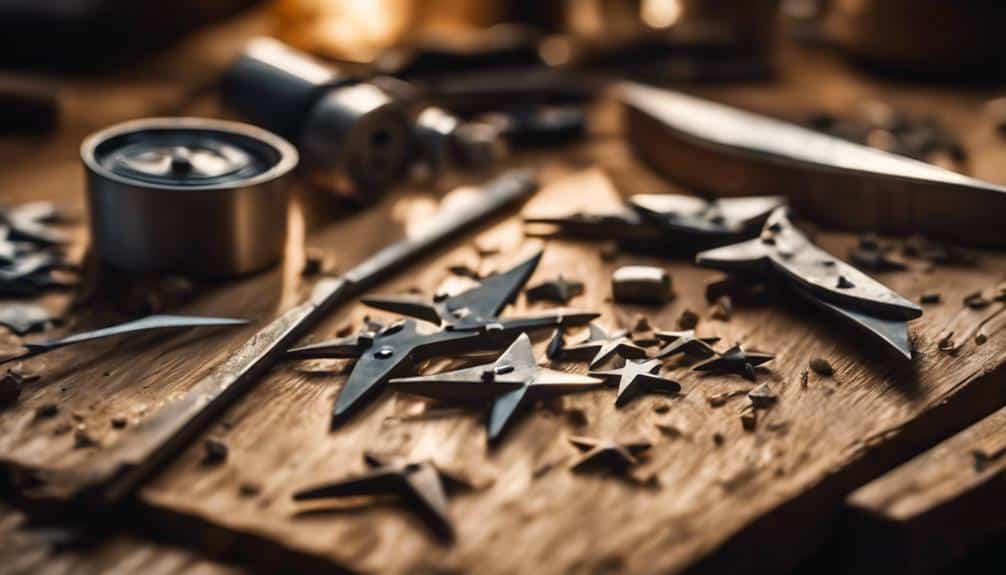
Essential Materials and Tools
When crafting
throwing stars, you’ll need to gather some essential materials and
tools to get started. First off, let’s talk about
material selection. You can use
old shovels or dull saw blades for unhardened versions, but if you’re looking for something tougher,
flat stock is your best bet. It’s like choosing between a soft pillow and a rock—one’s comfortable, but the other’s gonna stand up to the test! Additionally, consider checking the related products available on sale for some great deals on knives that might inspire your design.
Now, onto tools. You’ll want an
angle grinder or a hacksaw for shaping those metal pieces. Think of it as sculpting, but with a sharper edge! A drill with small bits is vital for preparing holes, while a belt grinder will help you get that smooth finish. Remember,
tool maintenance is key here; keep your tools clean and in good shape, or they’ll let you down when you need them most.
Designing Your Template
Creating a
precise template for your throwing star is essential for achieving the right shape and dimensions. You can use
Adobe Illustrator for a sleek digital design or just grab some paper and sketch it out by hand—whatever floats your boat! Just make sure your template aesthetics are on point, so it looks as good as it performs.
When you
cut it out, use scissors, and hey, a splash of
spray paint can really make it pop, helping you see those lines more clearly. Plus, aim for a design that peels off easily after cutting; nobody wants a torn template ruining their day. Be sure to add
distinct markings like center lines—these little guys will save you when you drill and grind later.
And remember,
sharing is caring! Upload your template to a public platform so others can benefit from your genius design variations. Who knows, your throwing star could inspire the next ninja master! So, roll up your sleeves, let your
creativity shine, and get ready to make something truly awesome. Your future throwing stars will thank you!
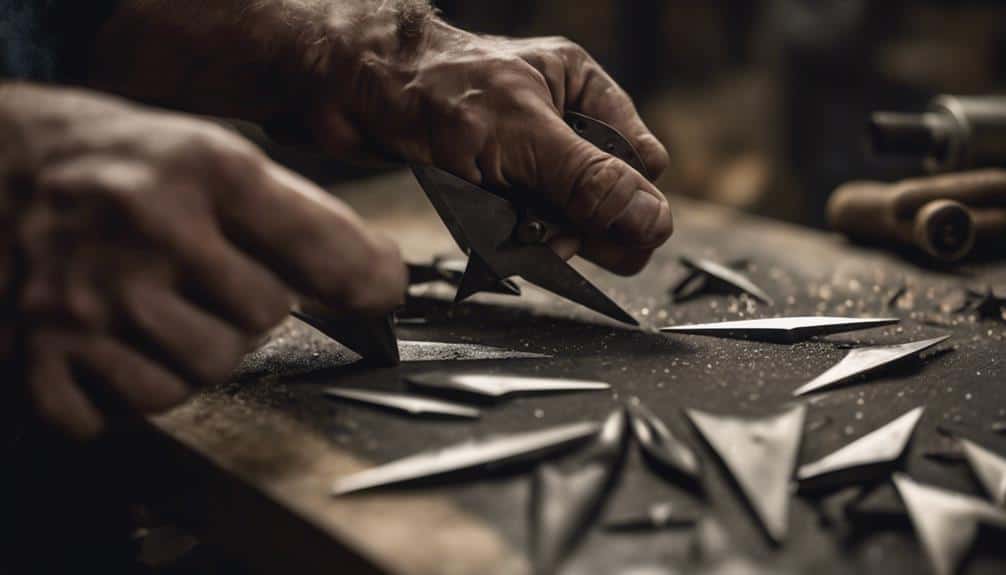
Cutting and Shaping Techniques
Alright, let’s talk about cutting and shaping your throwing star! You’ll want to grab your
angle grinder or hacksaw to get that rough shape just right, but take it slow—nobody likes a wonky star, right? And don’t forget to mark those center lines with a
Sharpie, so you can keep things symmetrical; trust me, your throwing skills will thank you later!
Template Design Essentials
Mastering template design is essential for crafting effective throwing stars, as it sets the foundation for precision and performance. You want your stars to fly straight and true, right? So, let’s engage in some key techniques to guarantee your template accuracy and design aesthetics shine.
- Choose Your Medium: Use Adobe Illustrator for crisp lines or hand-draw your design for that personal touch.
- Cut It Out: Grab some scissors to cut the template. If you’re feeling fancy, a little spray paint can make it pop and stick to your steel for easier cutting later.
- Drill, Baby, Drill: Mark your holes based on the template. This’ll make your grinding process smoother, trust me!
- Shape It Up: Use an angle grinder or hacksaw to cut the rough shape, then refine those edges with a belt grinder. Remember to keep it cool with water—nobody likes a burnt star!
With these tips, you’ll craft throwing stars that not only look great but also fly with precision. So, roll up your sleeves and get to work! Your throwing stars are about to get a serious upgrade!
Grinding Techniques Overview
How do you guarantee your throwing stars are both sharp and aesthetically pleasing? It all starts with the right grinding techniques. First, grab an angle grinder or a hacksaw to cut the rough shape. Keep a steady hand, or you might end up with a wonky star that wouldn’t impress anyone! After shaping, drill any holes for flair or function before the final touches.
Next, a belt grinder comes into play. It’s your best friend for precision, letting you shape those points and edges like a pro. Just remember to keep your workpiece cool by dipping it in water—overheating can ruin your masterpiece! Marking center lines with a Sharpie helps guide your grinding, ensuring your star stays symmetrical and balanced.
Here’s a quick reference table for you:
| Tool |
Purpose |
Tips |
| Angle Grinder |
Rough Shaping |
Maintain a steady hand |
| Belt Grinder |
Precision Grinding |
Keep it cool with water |
| Diamond Wheels |
Fine-tuning edges |
Use for a sharp finish |
Shaping Tools Comparison
When you’re choosing shaping tools for your throwing stars, understanding the strengths of each option can make all the difference. You’ve got some key players in the shaping game, each with unique perks.
- Angle Grinder: This bad boy’s got angle grinder advantages, making it perfect for zipping through rough shapes in no time.
- Hacksaw: If you need precision, the hacksaw gives you hacksaw control, letting you carve out intricate designs, though it might take a bit longer.
- Belt Grinder: After your initial cuts, this tool helps you achieve those sharp edges efficiently. Trust me, your throwing stars will thank you!
- Drill: Drilling holes before you shape helps with handling and keeps things from going south during cutting.
And hey, don’t forget to keep your workpiece cool with water while grinding! Overheating can ruin your metal’s strength. Plus, marking center lines with a Sharpie before you plunge in can really boost your precision and symmetry. So go ahead, get your tools ready, and transform those dull stars into deadly projectiles!
Grinding for Precision
To achieve the best results in grinding your throwing stars, using a
belt grinder is key. This magical tool makes it way easier to maintain
angle consistency on each edge, giving you that uniform sharpness you need. Before you jump in, grab a
Sharpie and mark center lines on your blades. Trust me, it’s a game-changer for keeping things symmetrical.
Now, let’s talk
edge cooling. Nobody wants their throwing stars to overheat and lose their mojo, right? So, every now and then,
dip those blades in water. It’s like giving them a revitalizing spa day! Plus, it helps maintain the metal’s properties, which is super important for performance.
Oh, and here’s a pro tip:
drill any holes before you start grinding. It’ll make your life a whole lot easier and avoid any nasty surprises grinding around those pesky holes. While you’re at it, regularly check the
sharpness of the edges. You want a fine edge that slices through targets like butter! Keep grinding, and soon enough, you’ll have those deadly throwing stars ready for action!
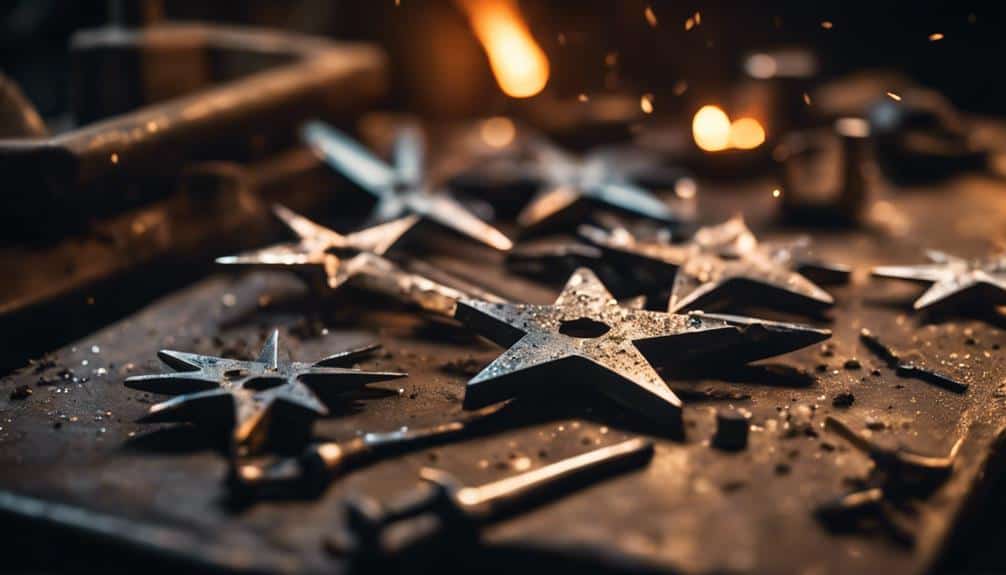
Hardening Your Throwing Stars
After you’ve achieved that
perfect grind on your throwing stars, it’s time to focus on
hardening them for
peak performance. This process is vital, so buckle up! Here’s how to do it:
- Preheat your oven to a sizzling 800°C. Seriously, it’s hotter than your ex’s temper!
- Place your stars inside for 10 minutes. This heat treatment is essential for effective hardening.
- Once time’s up, grab those bad boys and quench them in vegetable oil. This rapid cooling helps you hit a Rockwell hardness of 51 to 53—durability, baby!
- Finally, temper them in the oven at 300°C for 2 hours. This step restores toughness and reduces brittleness, making your stars ready for action.
If you’re using steel options like old shovels or dull saw blades, you’re in luck! They harden easily without the complications of tougher materials. Just remember to check the hardness regularly after the process. You want those stars to maintain their edge and
throwing accuracy, right? So get to it and turn those stars from dull to deadly!
Final Polishing and Finishing
Final polishing and finishing are essential steps in ensuring your throwing stars not only look impressive but also perform at their best. You want those stars to shine like a ninja’s dream! Start by using fine-grit sandpaper or a polishing wheel to smooth out the edges. This not only enhances their aesthetic appeal but also boosts their aerodynamic performance.
Here’s a quick cheat sheet for your final touches:
| Step |
Tool Needed |
Purpose |
| Edge Polishing |
Fine-grit sandpaper |
Remove nicks and enhance edges |
| Scratch Removal |
Polishing Compound |
Achieve a mirror-like finish |
| Protective Coating |
Light oil |
Prevent rust and corrosion |
After sanding, grab a soft cloth and use a polishing compound to eliminate any pesky scratches. Don’t forget to apply a light coat of oil afterward—rust and corrosion are not your friends. Finally, test the balance and weight distribution, as even slight changes can mess with throwing accuracy. With these polishing techniques and finishing touches, your throwing stars will be ready to steal the show—and maybe a few hearts, too!
Practicing Your Throwing Skills
When you’re practicing your
throwing skills, nailing down the right grip and stance is key, trust me! Start close to your target—like, 10-15 feet away—and as you get the hang of it, slowly back up to really test your skills. Remember, it’s all about that
smooth wrist flick; if you can get it right, your throwing star will soar like it’s on a mission!
Proper Stance Techniques
How can you guarantee your throwing technique is both powerful and precise? It all starts with your stance. Get this right, and your throws will be on point. Here’s how to nail those balance techniques and body alignment:
- Feet shoulder-width apart: This creates a solid base—no wobbly knees here!
- Non-dominant foot forward: Position it slightly ahead, giving you stability like a rock.
- Body sideways to the target: This alignment helps your throwing arm stay straight, elbow locked, ready to release some serious power.
- Eyes on the prize: Focus on your target, keeping your gaze glued to it throughout your throw. Channel your inner hawk!
Now grip that throwing star firmly, thumb on one side, fingers wrapped around the other. It’s like giving it a high-five! Remember to follow through, extending your arm and rotating your hips towards the target. This not only maximizes force but also adds a flair that’ll make you feel like a ninja. So, get out there, practice these techniques, and watch your throwing skills transform from dull to deadly!
Target Distance Practice
Mastering your target distance practice is essential for honing your throwing skills. Start by setting up a target distance of 10 to 15 feet—perfect for beginners enthusiastic to develop their accuracy and consistency. Use a sturdy target like a wooden board or hay bale; it’ll soak up the impact of your throwing stars, keeping them in top shape.
Stand with your feet shoulder-width apart and your non-dominant foot slightly forward. This stance helps you stay balanced during your throw. Focus on your grip—hold the star firmly but don’t squeeze it like it’s a stress ball. A smooth release is key to maximizing your accuracy.
To keep track of your progress, mark the distance and record your hits and misses. This way, you can adjust your technique and see improvements over time. Try incorporating accuracy drills to sharpen your skills!
Here’s a quick reference table to help you stay organized:
| Distance (ft) |
Practice Type |
| 10 |
Basic Throwing Drills |
| 12 |
Precision Targeting |
| 15 |
Advanced Accuracy Drills |
| 20 |
Challenge Throws |
Now get out there and throw!
Understanding Legal Implications
Maneuvering the
legal landscape surrounding
throwing stars can be tricky, as laws vary considerably by location. You don’t want to end up on the wrong side of the law while trying to release your inner ninja! Here’s what you need to keep in mind about legal restrictions and weapon classifications:
- In many countries, including Germany, owning throwing stars is a no-go, and you could face hefty fines or even criminal charges.
- Some U.S. states have specific laws that label throwing stars as prohibited weapons, making it essential to know your local regulations.
- A few regions might allow possession if they’re classified as collectibles—just be ready to prove that you’re not planning a surprise ninja showdown!
- Always consult legal resources or authorities before getting crafty with your throwing stars. It’s better to check than to regret!
Frequently Asked Questions
Are Shuriken Illegal?
Did you know that in Germany, shuriken are illegal weapons? Shuriken legality varies widely, so you’ll need to check martial arts regulations in your area before using or possessing them to avoid legal troubles.
How to Get Throwing Stars in MW3?
To get throwing stars in MW3, level up or complete specific challenges. Focus on perfecting your throwing techniques and improving star accuracy to enhance your stealth gameplay and surprise unsuspecting enemies effectively.
How to Make an Exploding Popsicle Stick Star?
Did you know that 75% of kids enjoy crafting? To make an exploding popsicle stick star, glue sticks together, hide explosive materials inside, and pull a string for a fun, surprising reveal! Enjoy your crafting!
Ninja stars, or shuriken, aren’t as effective as you’d think. Historically, they served more as distractions than lethal weapons. Their accuracy and impact depend on design, technique, and practice, making them less practical in modern combat.

 When crafting throwing stars, you’ll need to gather some essential materials and tools to get started. First off, let’s talk about material selection. You can use old shovels or dull saw blades for unhardened versions, but if you’re looking for something tougher, flat stock is your best bet. It’s like choosing between a soft pillow and a rock—one’s comfortable, but the other’s gonna stand up to the test! Additionally, consider checking the related products available on sale for some great deals on knives that might inspire your design.
Now, onto tools. You’ll want an angle grinder or a hacksaw for shaping those metal pieces. Think of it as sculpting, but with a sharper edge! A drill with small bits is vital for preparing holes, while a belt grinder will help you get that smooth finish. Remember, tool maintenance is key here; keep your tools clean and in good shape, or they’ll let you down when you need them most.
When crafting throwing stars, you’ll need to gather some essential materials and tools to get started. First off, let’s talk about material selection. You can use old shovels or dull saw blades for unhardened versions, but if you’re looking for something tougher, flat stock is your best bet. It’s like choosing between a soft pillow and a rock—one’s comfortable, but the other’s gonna stand up to the test! Additionally, consider checking the related products available on sale for some great deals on knives that might inspire your design.
Now, onto tools. You’ll want an angle grinder or a hacksaw for shaping those metal pieces. Think of it as sculpting, but with a sharper edge! A drill with small bits is vital for preparing holes, while a belt grinder will help you get that smooth finish. Remember, tool maintenance is key here; keep your tools clean and in good shape, or they’ll let you down when you need them most.
 Alright, let’s talk about cutting and shaping your throwing star! You’ll want to grab your angle grinder or hacksaw to get that rough shape just right, but take it slow—nobody likes a wonky star, right? And don’t forget to mark those center lines with a Sharpie, so you can keep things symmetrical; trust me, your throwing skills will thank you later!
 After you’ve achieved that perfect grind on your throwing stars, it’s time to focus on hardening them for peak performance. This process is vital, so buckle up! Here’s how to do it:
 When you’re practicing your throwing skills, nailing down the right grip and stance is key, trust me! Start close to your target—like, 10-15 feet away—and as you get the hang of it, slowly back up to really test your skills. Remember, it’s all about that smooth wrist flick; if you can get it right, your throwing star will soar like it’s on a mission!